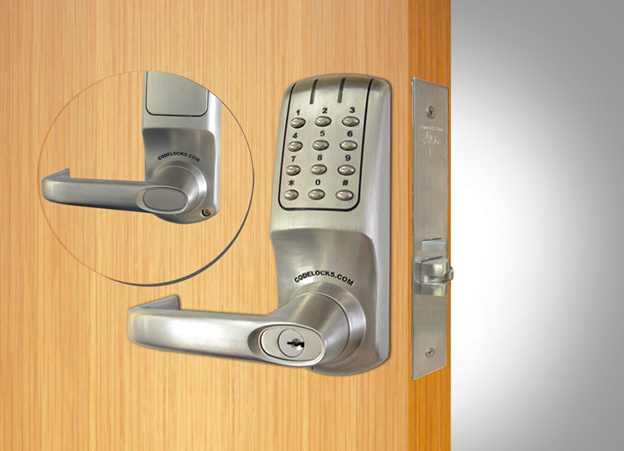
700 Series Mortise Latch Installation (openEDGE Medium Duty Commercial Levers - 7i CG)
700 Series Mortise Latch Installation Template (pdf)
Mortise Chassis Template Left Handed Door
Mortise Chassis Template Right Handed Door
*Please ensure pdfs are printed at 100% and all measurements are checked and confirmed before drilling
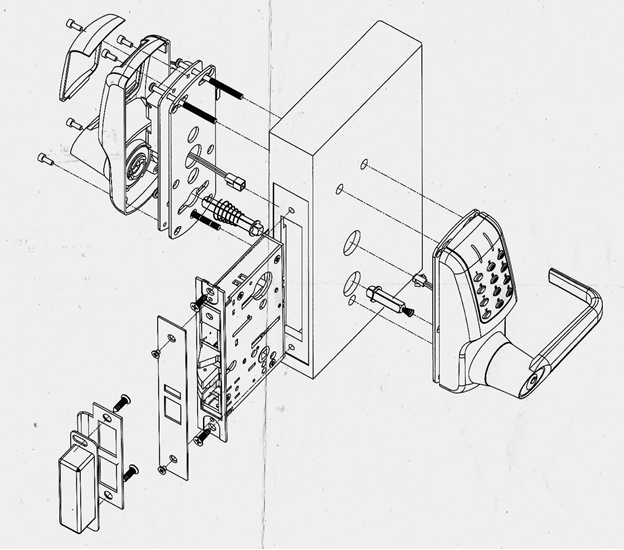
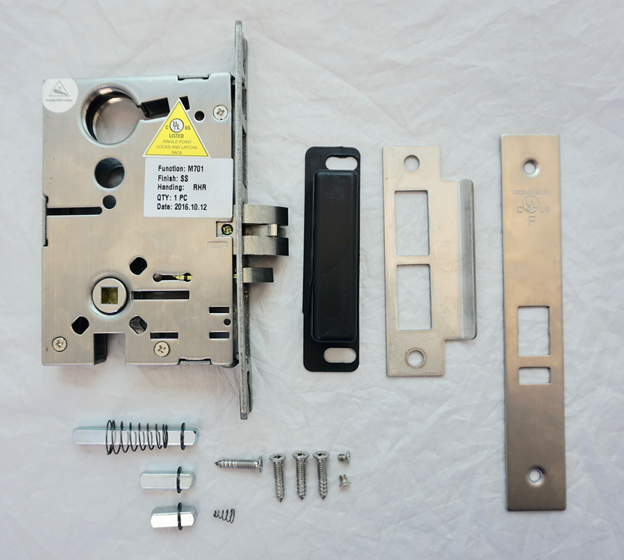
Parts List
- Mortise Latch
- One spindle with a large spring
- Two smaller sized spindles
- One small spring
- Four long Phillips head screws
- Two short Phillips head screws
- Latch cover plate
- Strike plate
- Strike plate dust box
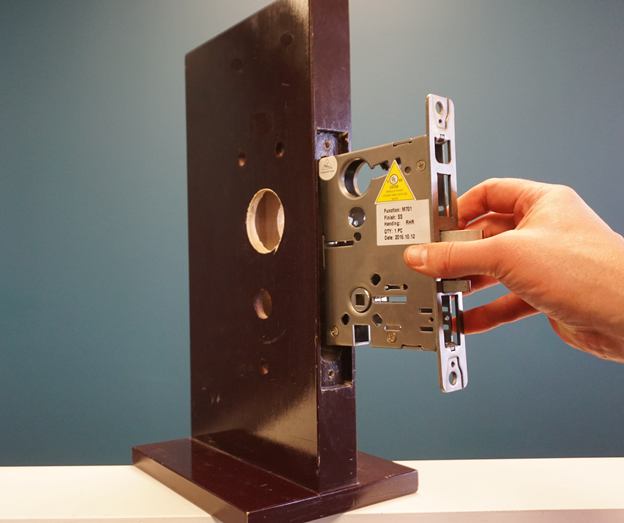
Latch Installation
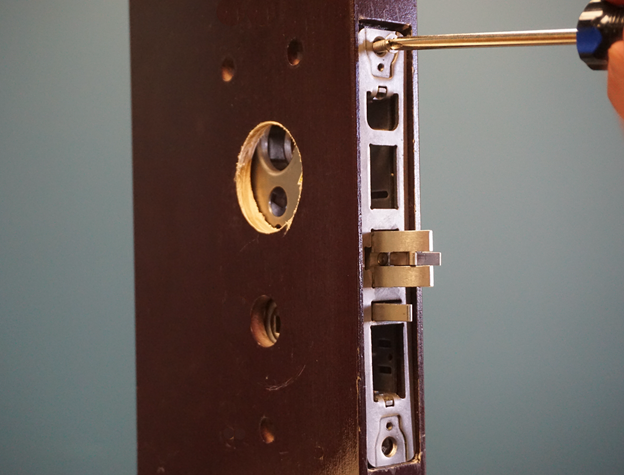
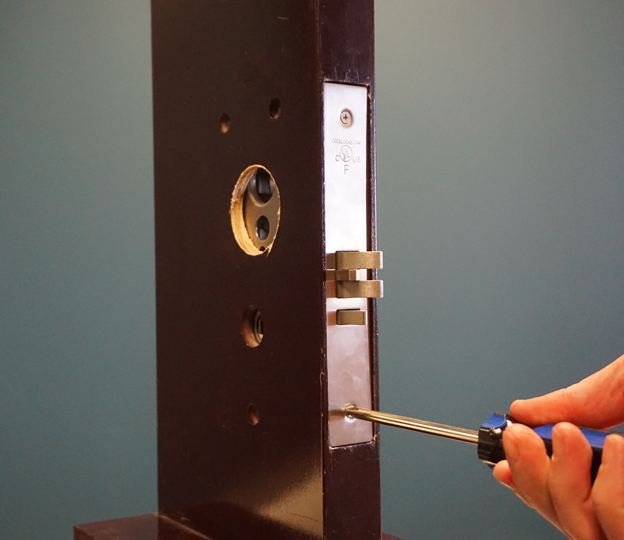
Slide the latch into the door frame. Ensure the latch teeth are facing the appropriate direction depending on whether your door is right or left hanging. To secure the latch to the door, screw two of the longer Phillips head screws into the latch.
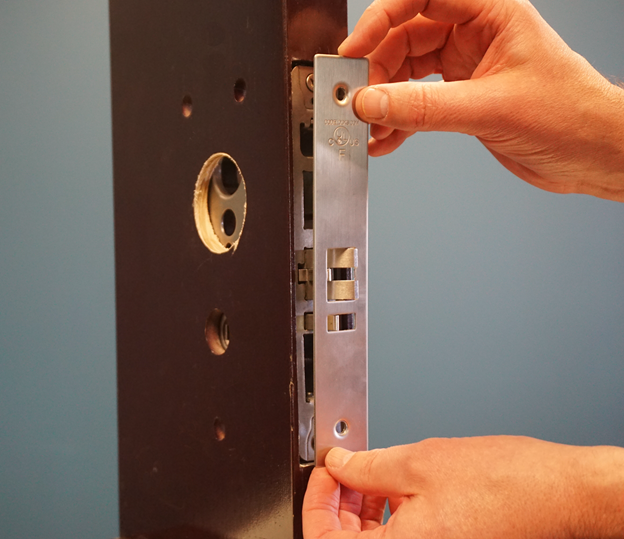
Attach the Latch Cover Plate to the latch using the two shorter screws.
Front Side Spindle Installation
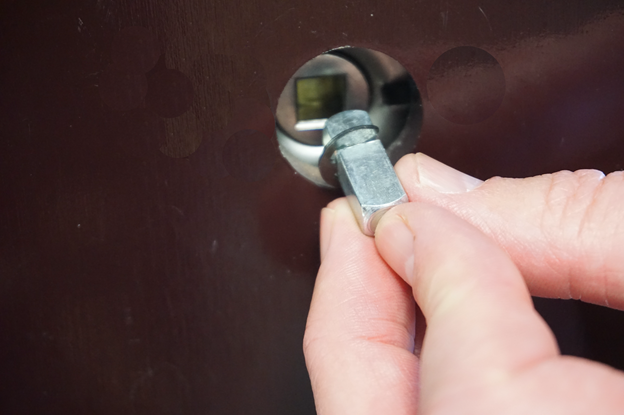
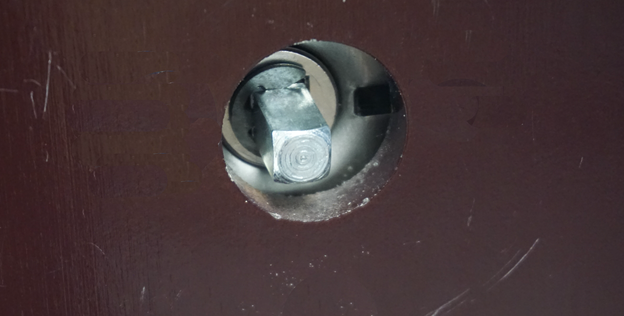
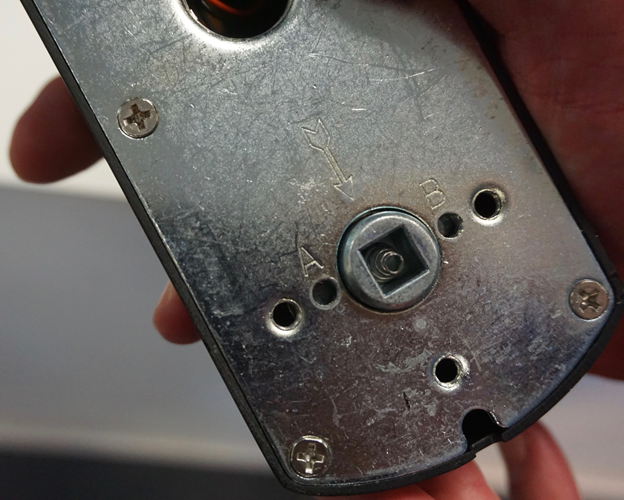
Insert one of the smaller spindles into the keypad side hub of the mortise latch. The spindle you use will be based on your door width. The spindle you choose should be long enough to maintain contact with the front lock hub but not too long that it doesn’t allow the front lock to lay flush against the door. The other smaller spindle that is not used will not be needed.
Insert the small spring into the keypad half of the lock body.

Run the power cable and the WiFi antenna (or the cable tube if used) from the keypad half of the lock through the top hole of the latch and attach the lock to the door ensuring the spring and spindle are properly aligned.


Interior Spindle Installation
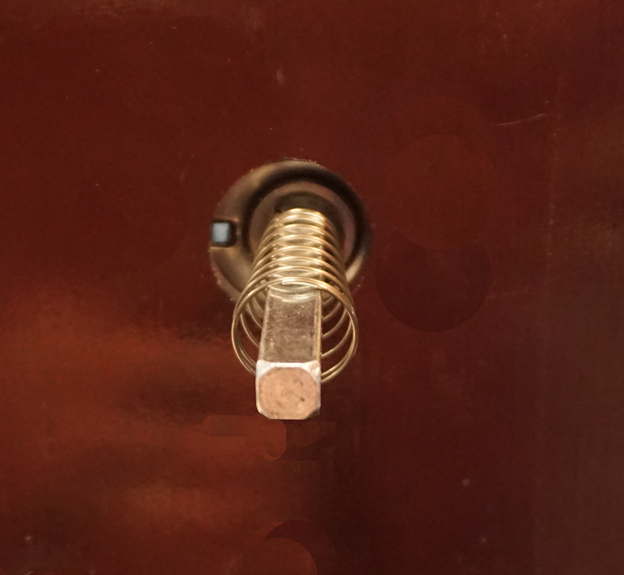
Insert the spring spindle (spindle with large spring) into the battery pack side of the latch.

You can now proceed with the remainder of the lock installation. If you have any questions or concerns please reference our help documentation available at support.remotelock.com or by contacting our support team.
The final install of the Mortise Latch and 700 Series Lock should look similar to this: