Please note:
The Schlage BE468ZP and Schlage BE469ZP locks will need a FirmWare update (initiated by Vera or Ezlo) in order to work with a Vera Controller and integrate without our system.
FYI about Schlage Z-Wave Plus locks on Vera. Vera released a firmware upgrade at the end of October that should fix issues with adding pin codes. Users need to log into their Vera controller, go to the Settings section then Firmware and follow the steps on the screen to upgrade. Users need to be on the 7.30 Firmware version. This screenshot is from the Vera interface.
Please contact Vera for additional information on this firmware update.
To integrate with Vera, start by clicking the integrations tab from the top of the Portal. From the Integrations tab, select the Vera tile.
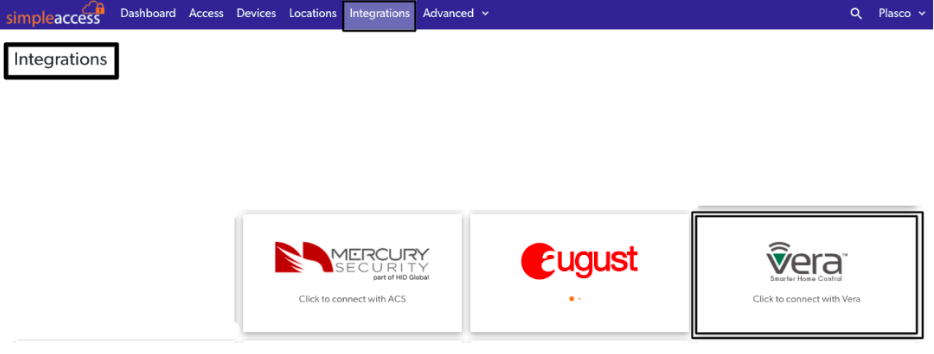
Add Controller
After the Vera integration has been initiated, you'll need to add a controller by clicking the 'Add Controller' button.
You'll also have the option to connect your pre-existing Vera Account by clicking the 'Connect Vera Account' button. Instructions on connecting your existing Vera account are found below in the 'Connect Vera Account' section.
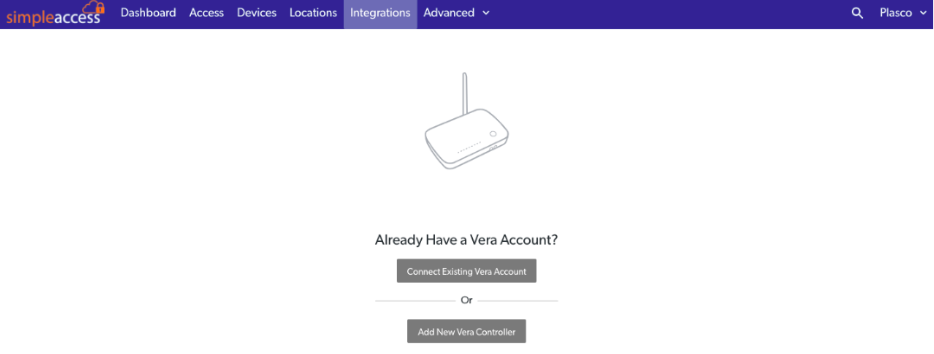
Clicking the 'Add Controller' button will pop up a form where you'll need to Name the Controller, add its Serial Number, Mac Address, and select a location.
Please note, Serial Number and Mac Address are found on the sticker on the bottom of the controller.

After filling in all the required fields and clicking 'Register' you'll receive a 'Controller registered' confirmation land on a page displaying the Controllers, Devices, and Locks. If ZWave Locks are already paired to the Controller, the ZWave Locks are imported & added to the SimpleAccess account automatically.

To pair the locks associated with the controller, click the three vertical dots next to the trash can icon and select 'Pair Lock'

Clicking 'Pair Lock' will prompt you with the following message:
'You are about to pair a Vera lock with a controller. The pairing lasts for up to 30 seconds. Only one lock can be paired at a time. After successful pairing, the lock will automatically show up nested under the controller.

Clicking 'Pair Lock' from this pop up will start the 30-second count down.

Each Zwave lock has a different process of pairing/unpairing. Some examples are below.
-
- Yale:
- Enter the 4-8 digit Master PIN code followed by the # key
- Press 7 followed by the # key
- Press 1 followed by the # key
- Kwikset:
- Press button “A”
- Schlage:
- Press the Schlage logo button
- Enter the 6 digit Programming Code
- Press the 0 button
- Yale:
Using the instructions found on your lock or in your lock's instruction manual, pair it with the controller during the countdown.
Once paired, you'll see all the locks paired with the controller under the 'View Devices' dropdown.
The locks will also show up under the Devices tab in the top navigation bar.

The cloud icons next to your device will be green when the device is online and red when offline.
If the cloud icon is red, follow the locks specific instructions to reconnect it to the hub and get it back online. You will need to refresh the devices tab to get the most up to date online/offline status.
Connect Vera Account
Clicking the ""Connect Vera Account"" button will pop up a box where you will need to enter your Vera Username and Vera Password to log in and sync the accounts.
After adding the username and password, click ""Connect"" to start the import.
You'll receive an ""Account Connected"" message and see your username populated in the dashboard with a dropdown.
Clicking the dropdown will reveal the controllers ready for import from your Vera account. The next step will be to add a location. Clicking the location field will drop down a list of your pre-configured locations . Select the appropriate location and click ""IMPORT"" to add the location to your controller. If you don't see a fitting location, you can add a new one by selecting ""Add Location"".

After a controller has been imported, you'll get a ""Controller Imported"" notification your device will show with its Serial Number, Name, and Location.
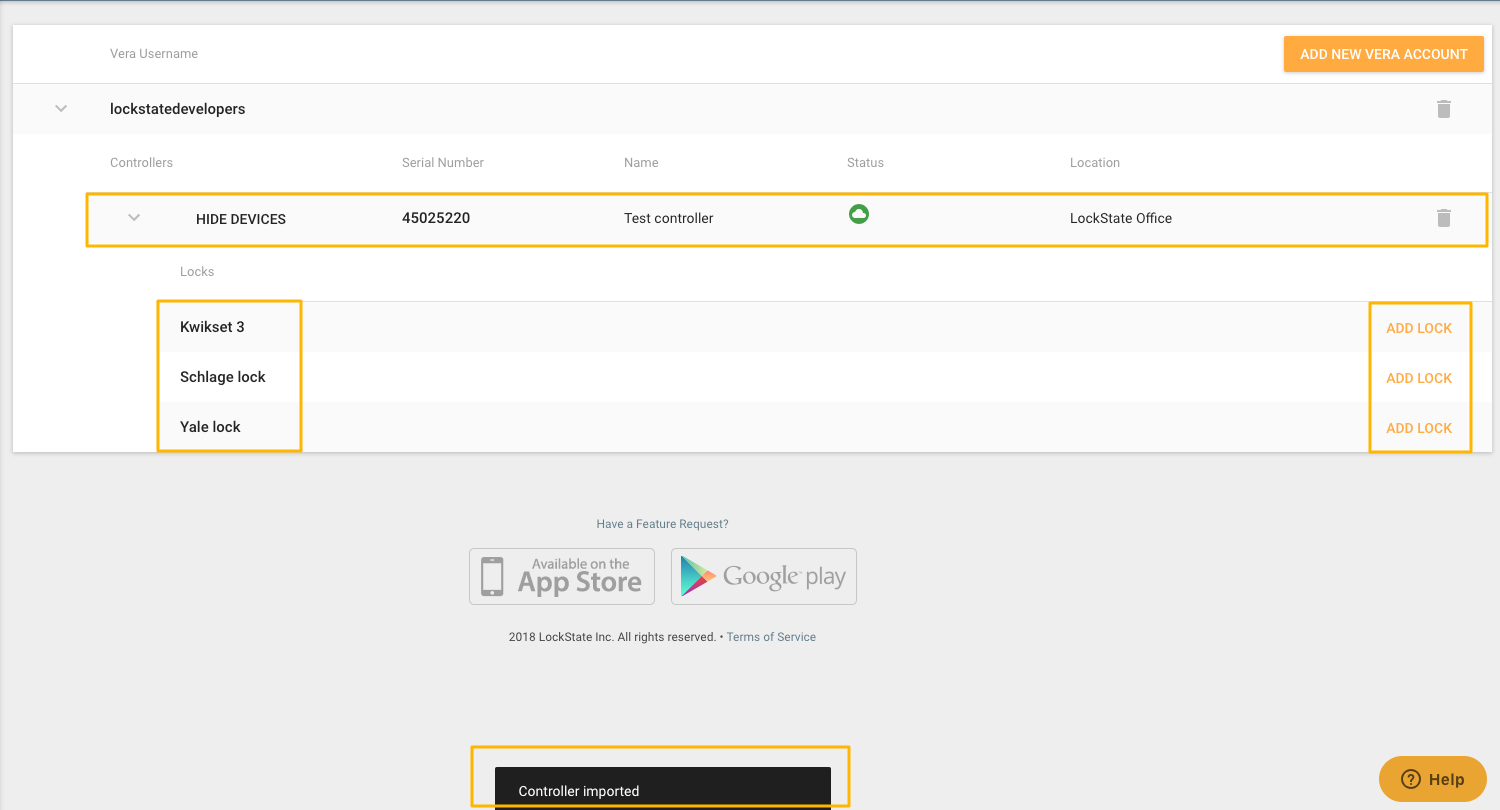
Clicking the drop-down next to your Controller's serial number (indicating Hide Devices or Show Devices) will display all the locks associated with this controller.
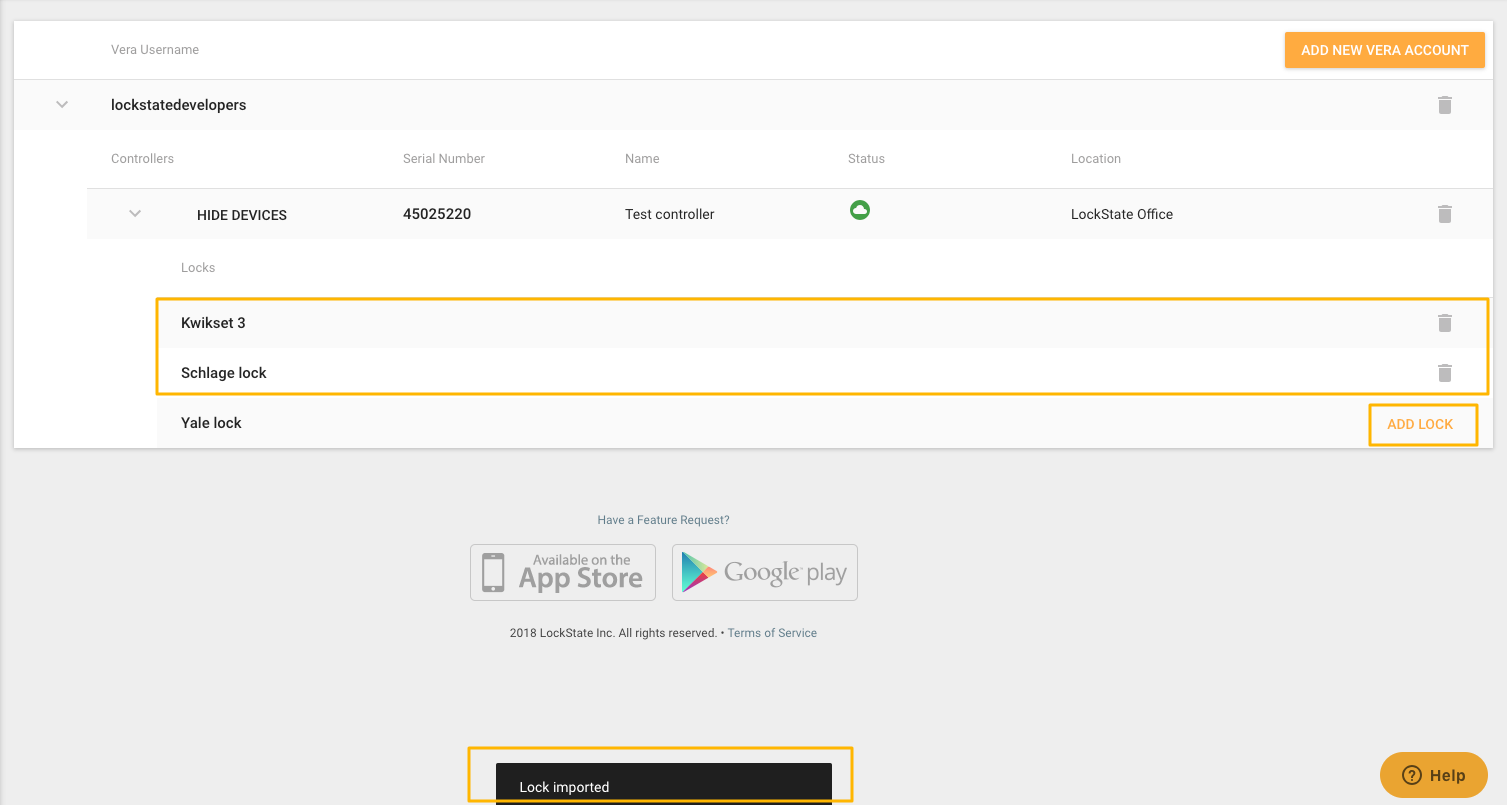
Next, you'll need to ""ADD"" any of the locks you would like to add to the portal. To do this, simply click ""ADD LOCK"" next to the lock of your choosing. After the lock has been imported, you'll see a ""Lock Imported"" message. You will have the option to delete an individual lock or the entire Vera account by clicking the trash can icon next to it.
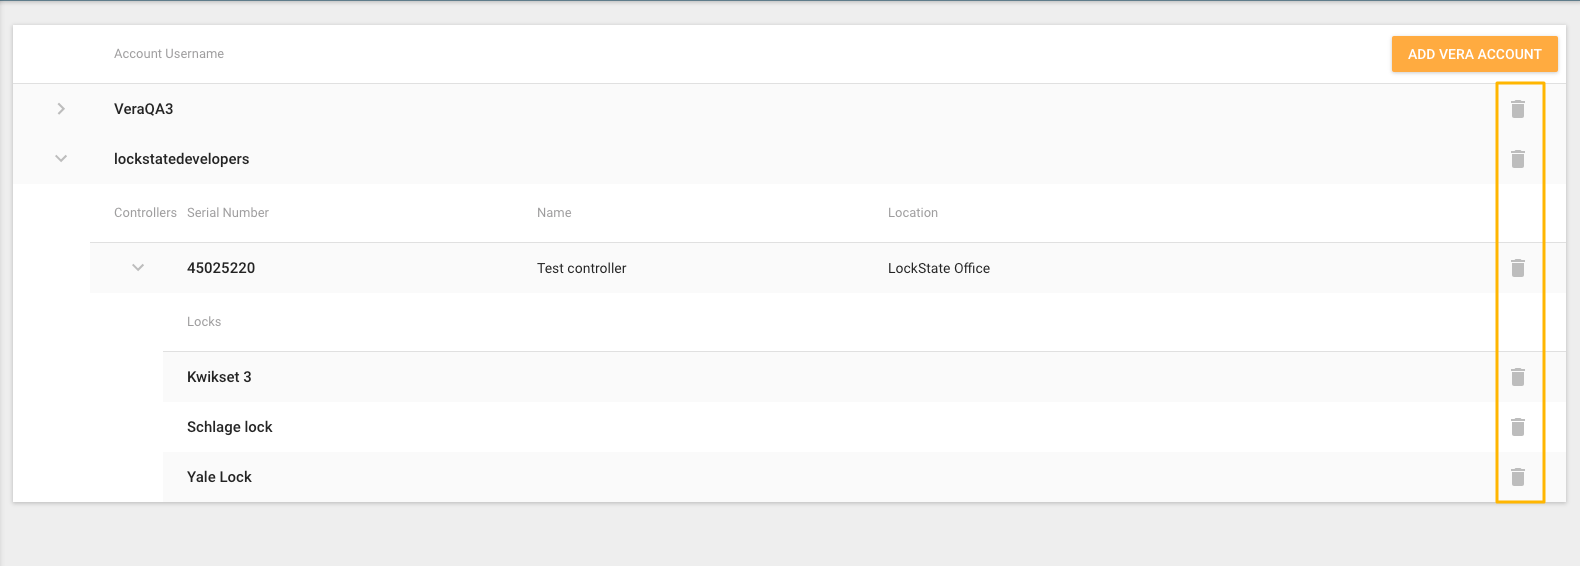
Updated Instructions to Delete and Remove a Lock from SimpleAccess:
- Log in to your Vera account
- Delete the lock from your Vera account
- Once deleted from Vera, log back into your SimpleAccess account
- Go the the ""Integrations"" tab
- Click on the Vera integration tile
- Disconnect your account temporarily by clicking on the trash can to the right of your Vera Account name (NOT the controller name)
- Once deleted, click ""Connect with Vera Account"" again and reconnect your Vera account
- This will bing back the controllers associated with your Vera account, which will now show that this lock is no longer connected to it and the lock will now be removed from the SimpleAccess portal.
After the lock has been imported, the integration is complete and you will see your Vera locks displayed with a blue/purple icon in the DEVICES tab. From the devices tab, you can favorite the lock by clicking the star icon (favoriting a lock will display it on your DASHBOARD or login screen in addition to the devices tab). From the devices tab you can also remotely lock and unlock the device by clicking the lock icon (red lock icon = locked and green = unlocked), you can see the lock's battery level by clicking the battery icon and connection status indicated by a red or green cloud icon.

Clicking into a specific lock will provide you with even more details and functionality. After clicking into a lock you can add an Access User, add an Access Guest, See the lock's events, and edit the lock's settings.

Clicking the "Settings" tab will bring you to the devices Access Instructions to customize the message your users and guests receive after an email is initiated.
Error Messages
When adding or editing an access guest or user, you may encounter an error message. An error will be indicated by a circled exclamation mark next to the guest or user.
Examples of errors are 'PIN length error' which results when the pin code assigned to the user is too long or short.
Each device has its own specifications and the length of the pin must meet the specifications set by the lock.
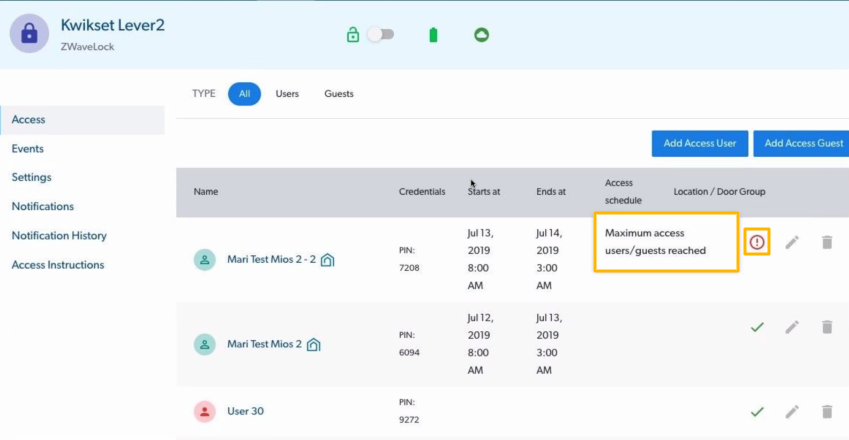
Another example of an error would be “Maximum access users/guests reached”. This is caused by too many codes on a device.
Each device has its own specifications and the amount of access guests and users per device must meet the limits set by the lock.

Please Note: Schlage Zwave locks - all codes, by default, must be 4 digits in length. You cannot use 5 - 8 digit pin codes unless you program that length into the keypad of the lock. If you do change the pin length, all codes on that lock must be that length.
Advantages for using the Connect portal with MiOS:
- Additional Functionality for Vera Customers provided by SimpleAccess
- Centralized Multi-property management - control all devices across all controllers in a single view (Vera site is siloed by Controller)
- Centralized Access User Management
- Mass User Management (assign to groups/locations)
- Guest Code Functionality
- Access Schedules (M-F, 9-5)
- Full-featured notification management
- Expanded hardware Interoperability - control any door & common door functionality
- Account Member Roles & Permissions
- Guest Access Automation
- Listing Company integrations - automate your access control
- Expanded SaaS Opportunities
Add-on Functionality:
- Tenant module (complex pricing & permissions rules engine)
Rich Reporting (user/device/member logs)
Organizations Manager (Prologis)
Text To Guest
Software Integrations
------------------------------------------------------------------------------------------------------
Supported Lock Models from the Vera portal:
Yale
YRD226
YRD216
YRD256
YRD246
YRD110 BL1
YRD120 TL1
YRD210
YRD416
Kwikset
954 OBN
Smartcode 888
Smartcode 916
Smartcode 914
Smartcode 912
Smartcode 910
Schlage
FBE469NX CAM
FBE469NX CEN
BE469NX CEN
FE469NX CAM
BE469NX CAM
BE369NX CAM
FE599NX CAM
Please note:
The Schlage BE468ZP and Schlage BE469ZP locks will need a FirmWare update (initiated by Vera or Ezlo) in order to work with a Vera Controller and integrate without our system. The FW update is needed in order to support the S2 Security protocol which is necessary to pair the ""ZP"" lock to the Vera Controller.
Please contact Ezlo and/or Vera for the latest information on this lock and the FW required to work with our systems. The Vera and Schlage BE469ZP lock will need a firmware push in order for their controller to pair and for everything to work as intended. Without this update the BE469ZP model will not be supported.
------------------------------------------------------------------------------------------------------
From the Vera portal, the user will see the MiOS Base Functionality. The following functionality is available through the Vera portal.
Additional information for troubleshooting vera/mios is available through Vera support: http://getvera.com/support/
Navigation: The main dashboard will show a list of controllers. To see any device or user, you will need to drill down into the controller. From here, you can not manage users across controllers/devices.
Clicking into a controller redirects you to the dashboard being served up by the local controller on site.
Controller Dashboard:
After Clicking into a controller, you are then sent into that controller's dashboard.
Features:
- Overview of home energy use (if using the EchoLabs plugin)
- System Status
- Security (if using Security plugin/upgrade)
- Modes (Home, Away, Night, Vacation - preconfigured scenes)
- List of Devices/Configurable shortcuts
Lock List View:
Clicking Devices on the left menu brings up a list of locks connected to that controller.
Features:
- Lock Status
- Battery level
Device Management:
Once clicking into a lock, below is the lock management view:
Lock Functionality:
- View locks & status connected to controller
- View existing users
- Add/Delete User
- Lock/Unlock
- View History
Advanced Settings:
About 50 advanced settings are found here.
View Codes/Users:
History Logs:
A pretty crude list of log events is included. To get to the actual event & see who unlocked the door, you need to click into the log event.
Add User:
Notifications:
Notifications can be set up for the following options:
Scenes:
Scenes allow you to create rules with If/Then statements. For example, If door unlocks, Then turn on light.
Additional information for troubleshooting vera/mios is available through Vera support: http://getvera.com/support/