From the 'Advanced' drop-down in the upper navigation bar, select 'Automated Emails'.
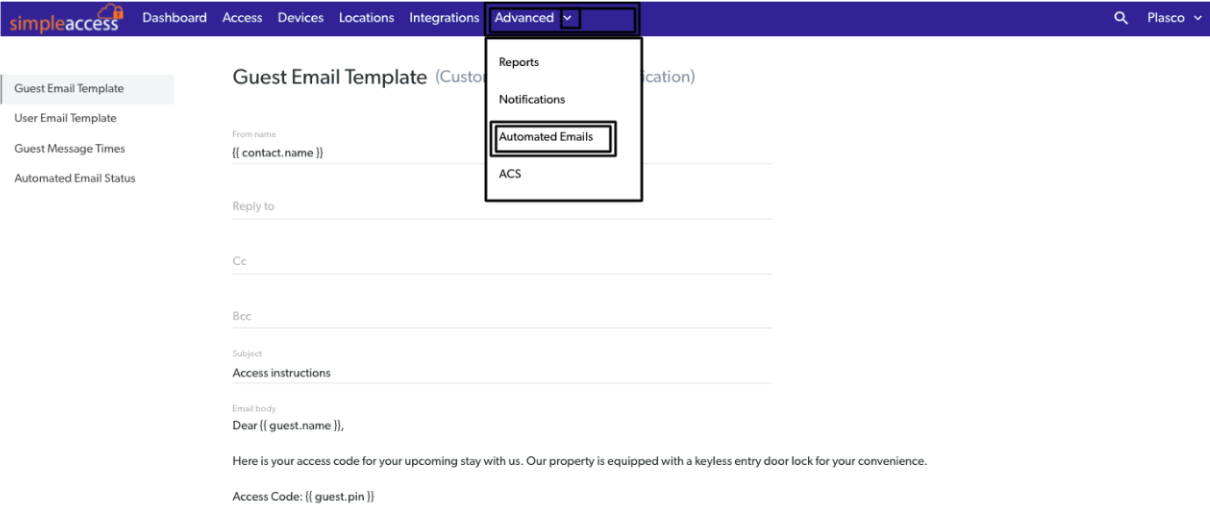
From the Automated Emails tab, select either the "Guest Email Template" or "User Email Template" tab depending on the type of Access Instruction email notification you want to edit (either for an access guest or an access user).
After generating an Access Guest or User with an email address, the portal provides the option of sending an email to the guest or user with device-specific access instructions.
The email is formatted in the Guest or User Email Template tabs and utilizes dynamic tags to pull in information such as the guest name, guest code and more.
Editing the Email Template
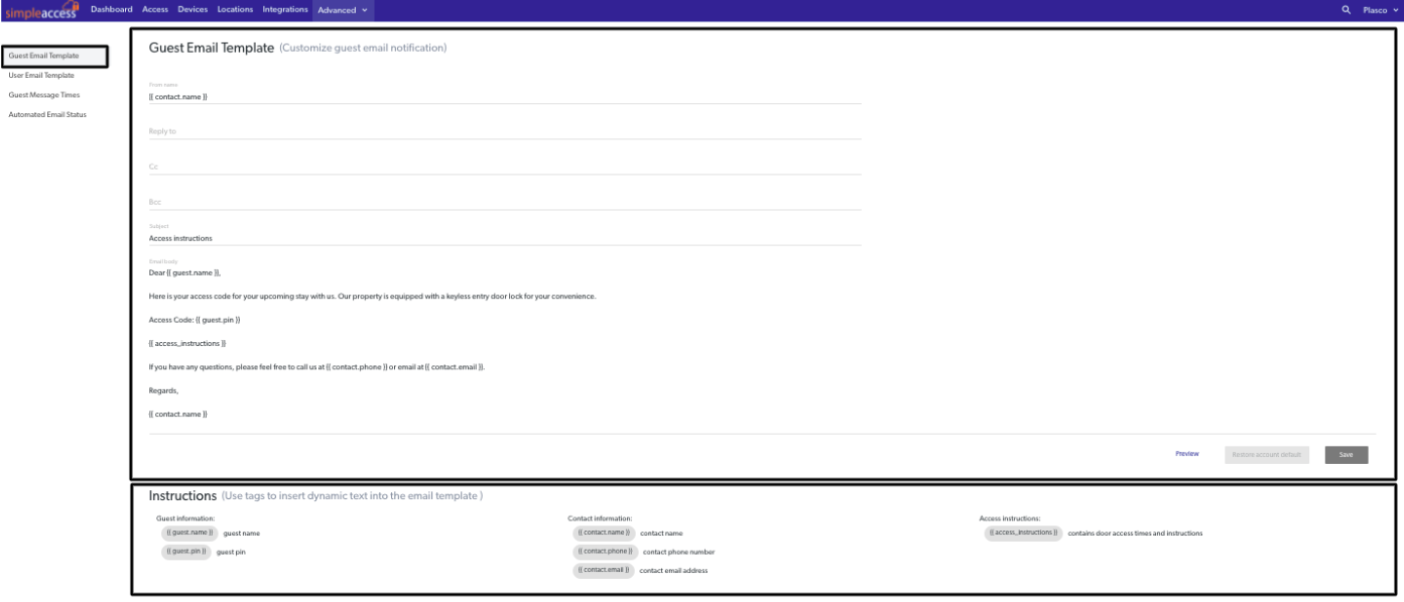
By default, an email template is provided for each account. The email template editor allows users to modify the text and appearance of the email if desired. This email template will be used for all locks within an account. If special instructions are needed for a particular lock, those can be added to the Access Instruction tab within each Device.
Both the Guest or User Email Template and the Device's Access Instructions support Markdown language formatting. Using the Markdown commands, you can make your text bold, italic, insert images, apply more spacing and much more! Markdown formatting is explained in detail in our Guest Email Template Formatting article and on the Github site's mastering markdown article.
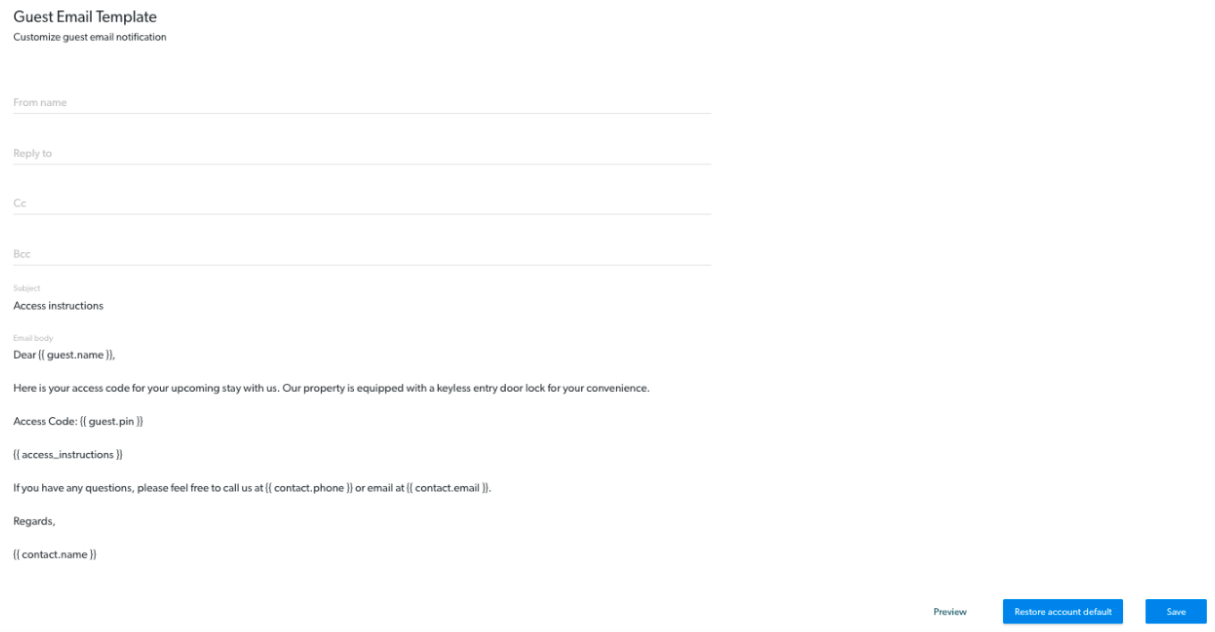
Below describes each field available to edit in the Guest Email Template:
From name
The name that will be displayed as the email sender.
Reply to
If a guest replies to the email, this email address will be used for the reply.
Cc (Carbon copy)
A copy of the Guest Email will be sent to the Cc email and the Cc email address will be visible to the Guest.
Bcc (Blind carbon copy)
A copy of the Guest Email will be sent to the Bcc email and the Bcc email address will not be visible to the Guest.
Subject
The text placed in the subject line of the Guest Email.
Email body
The text is placed in the main part of the email message.
Preview
An example of the email a Guest will receive.
Restore Account Default
The current Guest Email Template will be erased and the default Guest Email Template will be restored.
Save
Save the changes to the template.
Available Dynamic Tags
Tags are used to insert dynamic text into the email template based on the information from the account and from the guest. For example, the text {{ guest.name }} in the template will be replaced with the guest's name John Doe in the sent email.
Guest information:
{{ guest.name }} = guest name
{{ guest.pin }} = guest pin
Contact information:
{{ contact.name }} = contact name
{{ contact.phone }} = contact phone number
(please note, phone number is pulled from the locks location info. exactly as it is formatted there).
{{ contact.email }} = contact email address
Access instructions:
{{ access_instructions }} = contains door access times and instructions

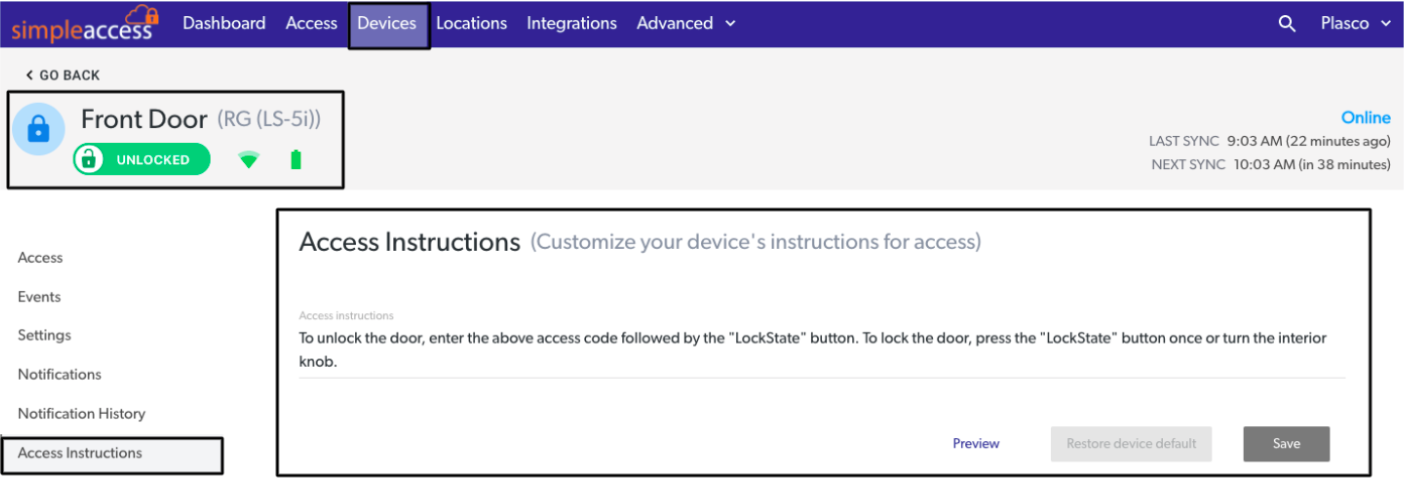
Per-Lock Instructions
The {{ access_instructions }} tag will be replaced with the information located in each lock's 'Access Instructions' tab. The default instructions for each lock are below and can be modified to include additional information for each lock.
SimpleAccess Locks
There are two methods to opening the lock on your vacation rental. One is to simply enter the 10 (or 12 if provided) digit Access Code above, followed by the '#' key. The other is to create your own shorter code for use during your stay.
Method 1: Use Default Access Code Enter the following on the lock’s keypad: Access Code, # (Door will unlock)
Method 2: Create Your Own Code (Can be 3 – 5 Digits)
Step 1: Hold the # key until green light is solid (About 2 seconds), then release.
Step 2: While green light is lit, enter Access Code, #, Your Own Code, #. Now you have programmed your own code into the lock. Next step is to unlock the door using the code you just created.
Step 3: Enter Your Code, # (Door will unlock)
500 series
To unlock the door, enter the above access code followed by the "LockState" button. To lock the door, press the "LockState" button.
Other
To unlock the door, enter the above access code followed by the "LockState" button. To lock the door, press the "LockState" button once.
600 Series, 5500 series
To unlock the door, enter the above access code followed by the "#" key. To lock the door, press the "*" (star/asterisk) key twice or press the "Lock" button from the inside.
Contact information:
{{ contact.name }} - contact name
{{ contact.phone }} - contact phone number
{{ contact.email }} - contact email address